By: Otaiba Ahsan
If you find yourself in a position where you’re having a valet or someone you don’t know too well parking your car, then it can be quite nerve-wracking. There are plenty of horror stories where a valet driver crashes a luxury car doing something they weren’t supposed to. That’s why automakers like Tesla have introduced something called Valet Mode, which limits the car’s capabilities for these types of situations. Continue reading for steps on how to put your Tesla Model 3 and Model Y in Valet Mode.
What is Valet Mode?
Valet Mode is a setting you can put your Tesla in that restricts many features of the car. Its purpose is to allow the person driving to do just that – drive. When you set your car in Valet Mode, the following restrictions apply:
- The key card must be used to access your Tesla.
- The speed limit is set at 113 km/h, and maximum acceleration and power are limited.
- Both the front trunk and glovebox are locked, and voice commands are disabled.
- Home and Work locations are not visible in the built-in navigation.
- Autopilot and other convenience features are not available.
- The Allow Mobile Access setting cannot be changed, and Driver Profiles are not accessible either.
- The touchscreen won’t display the list of keys that can access your Model 3 or Model Y.
- Both Wi-Fi and Bluetooth are unavailable. Drivers won’t be able to pair new devices to the car when in Valet Mode.
The most common scenario where Tesla owners use Valet Mode is when they need someone, typically a stranger, to go and park their car. This feature helps bring an added layer of safety to your vehicle, as the person who’s driving it cannot really do anything besides drive.
Starting Valet Mode
Enabling Valet Mode in your Model 3 and Model Y is extremely easy. Make sure your car is in park, then simply tap the driver profile icon, touch “Valet Mode” and you’re all set.
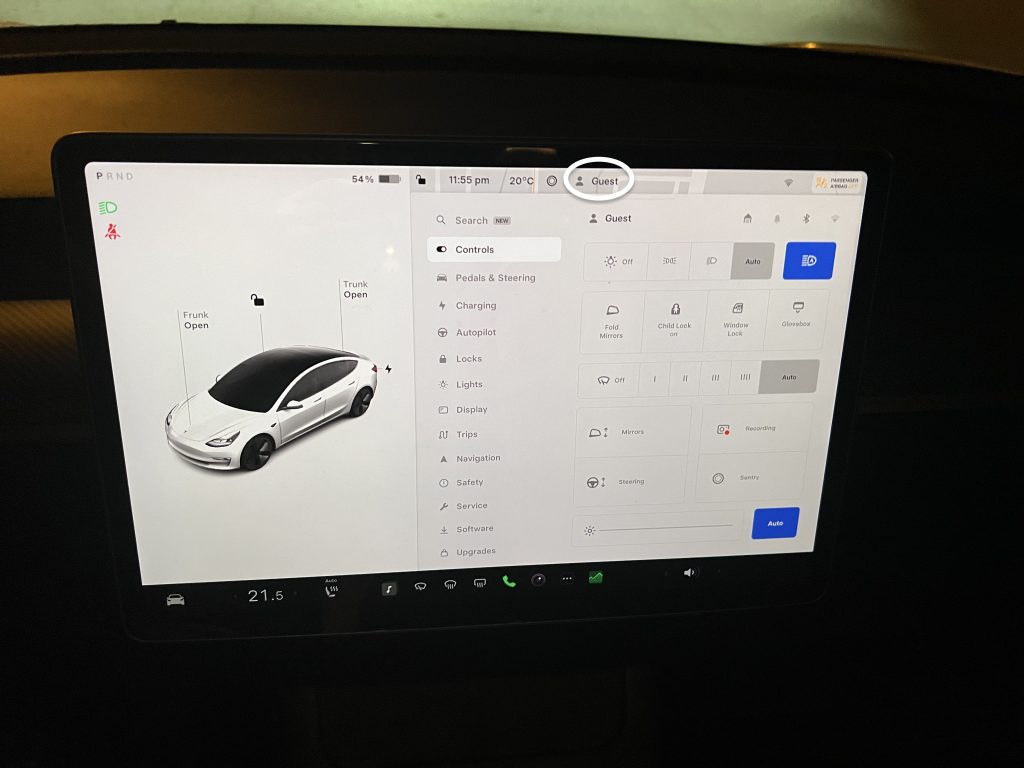
The first time you enable this feature, the car will ask you to create a 4-digit PIN to exit the mode. This is to ensure that whoever is driving the car cannot simply cancel it and have access to everything. When in Valet Mode, the touchscreen will display the word Valet and the driver profile will also indicate you’re in that setting.
You can also use the mobile app to start and cancel this feature. When in the app, tap Security & Drivers > Toggle Valet Mode. You won’t need to enter a PIN since you’re already required to log in when using the Tesla app.
NOTE: If you have the PIN to Drive setting enabled in your Model 3 or Model Y, then you’ll have to enter that first before you can enable Valet Mode. Also, if you forget your valet PIN, then it can be reset from inside your car by entering your Tesla account credentials. This can also be accomplished from the mobile app.
Cancelling Valet Mode
When you receive your vehicle again, you’ll want to exit out of the valet setting. Make sure your car is in Park, then tap the Valet Mode driver icon at the top of the screen and enter your 4-digit PIN.
When cancelled, all the settings associated with the most recently used driver profile are returned. This includes climate control, seat adjustment, steering wheel position, where the side mirrors were, and much more.
The Bottom Line
The steps on how to put your Tesla Model 3 and Model Y in Valet Mode are simple. When in your car, tap the driver profile icon and hit Valet Mode. If you’re doing it for the first time, you’ll need to create a 4-digit PIN. When using the app to enable it, tap Security & Drivers and then toggle Valet Mode so it’s on. This feature acts as additional security for your peace of mind when handing your car over to another person.