By: Otaiba Ahsan

A key factor in any car purchasing decision is storage. Naturally, the first place most think of when it comes to storage is the trunk. One annoyance that you may come across in newer vehicles is the opening height of their automatic trunks. The cars of today mostly have fixed positions for their liftgates, which can be an issue for some. Whether the normal location is too tall, or you’re avoiding a low ceiling, being able to set it where you want is an added perk. Lucky for you, the liftgate position is adjustable for the entire Tesla lineup. Continue reading for steps on how to adjust the opening height of the trunk of a Tesla.
Adjusting Liftgate Opening Height
Before we adjust the liftgate height, we must first learn how to get the trunk open first. There are several ways to accomplish this:
- Touch the Open button on the touchscreen inside your Tesla when the car is in park.
- Tap the rear trunk button in the Tesla app.
- Double-click the rear trunk button on the Tesla Key Fob.
- Press the switch located under the liftgate’s exterior handle, a valid key must be detected for this option to work.
When you’ve successfully used any of these options to pop the trunk, you’ll see it stops at a fixed position. As mentioned before, there might be times when you need to change this height to avoid low ceilings or hanging objects. Here are the steps to adjust the liftgates opening height:
1. Open the rear trunk, then manually lower or raise the liftgate to the desired height.
NOTE: Don’t move the trunk too quickly or forcefully as it can potentially damage the mechanism, especially in extreme weather conditions.
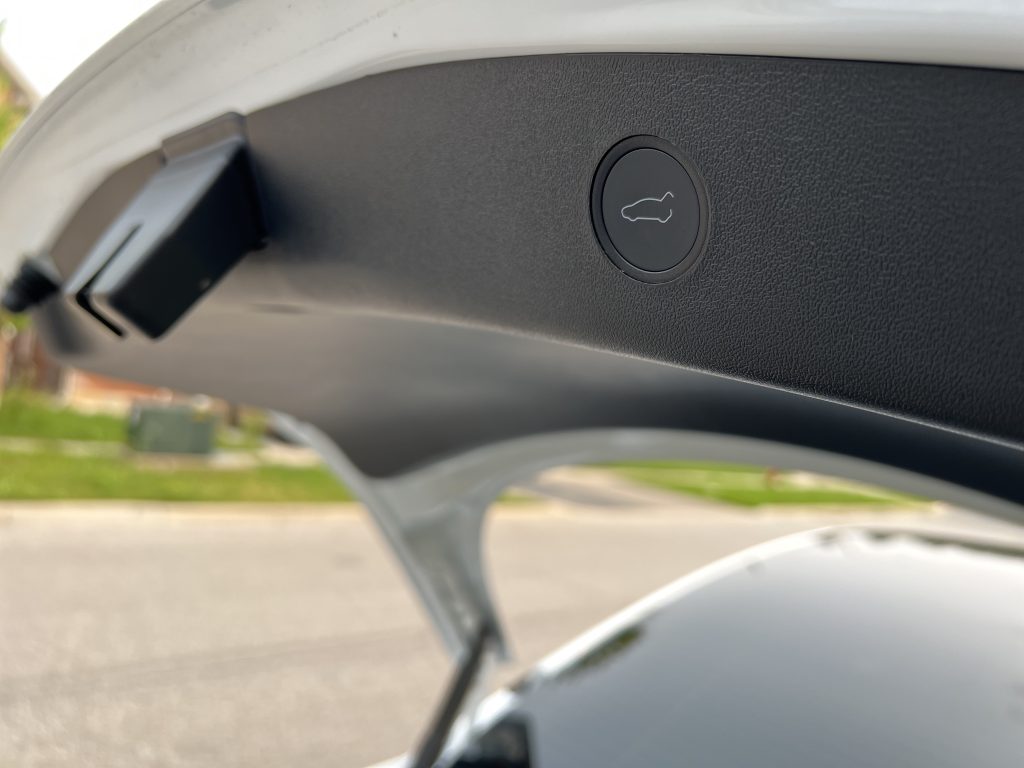
2. Press and hold the button on the underside of the liftgate for three seconds until you hear a confirmation chime. This is the same switch you use to close the trunk.

3. Quickly confirm whether your new height has been set. This can be accomplished by opening and closing the trunk one last time to see if the setting has been saved.
FACT: Most configurations of the Tesla lineup of sedans and SUVs open their liftgates to a height of 2.3 metres when set normally. Of course, this can be adjusted.
Trunk Accessories
Tesloid offers several accessories for the rear trunk of the Model 3, Y and S. You can find a broad list by searching “trunk” on the site. Here are some that I’d like to highlight:
1. Trunk Mat (Available for Model 3, Y and S): Getting a mat for your rear and front trunks will help protect the interior of your car. They can withstand any dirt, debris, spills, or snow that may come in contact with your trunk. This is especially handy if you’re frequently loading cargo that can leave a mess like food or garden supplies. All the Tesloid Trunk Mats are made to fit each Model they’re available for and match the minimalistic look of Tesla.
2. Lights (Available for Model 3, Y and S): Tesloid has three different products that help add light to the trunk, a unique one for each of the Model 3, Y and S. This includes the Model 3 Trunk Puddle Lights, Model Y Trunk LED Strip, and the Model S Trunk Puddle Lights. All three serve the same purpose – lighting up the trunk and frunk. They are 9 to 10 times brighter than the OEM trunk light, and can be useful for those who struggle to see in the dark.
3. Storage Extender (Model Y Only): The Model Y Trunk Side Storage Extender is a great way to add cargo. It extends the corner space, allowing you to tuck away more items. It’s ideal for storing cleaning or other utility items. It’s a simple Velcro strip that makes installation a breeze.
The Bottom Line
The steps on how to adjust the opening height of the trunk of a Tesla are simple. Open your trunk and manually raise or lower the liftgate to the height you’d like it to be. Next, press and hold the button on the underside of the liftgate for three seconds until you hear a confirmation chime. Remember, this is the same button you use to close the trunk. You can open and close it to confirm if the new height has been saved.
